Customize Your EVM-Powered Subnet
All Subnets can be customized by utilizing Subnet Configs.
A Subnet can have one or more blockchains. For example, the Primary Network, which is a Subnet, a special one nonetheless, has 3 blockchains. Each chain can be further customized using chain specific configuration file. See here for detailed explanation.
A blockchain created by or forked from Subnet-EVM can be customized by utilizing one or more of the following methods:
Subnet Configs
A Subnet can customized by setting parameters for the following:
See here for more info.
Genesis
Each blockchain has some genesis state when it’s created. Each Virtual Machine defines the format and semantics of its genesis data.
The default genesis Subnet-EVM provided below has some well defined parameters:
{
  "config": {
    "chainId": 43214,
    "homesteadBlock": 0,
    "eip150Block": 0,
    "eip150Hash": "0x2086799aeebeae135c246c65021c82b4e15a2c451340993aacfd2751886514f0",
    "eip155Block": 0,
    "eip158Block": 0,
    "byzantiumBlock": 0,
    "constantinopleBlock": 0,
    "petersburgBlock": 0,
    "istanbulBlock": 0,
    "muirGlacierBlock": 0,
    "subnetEVMTimestamp": 0,
    "feeConfig": {
      "gasLimit": 8000000,
      "minBaseFee": 25000000000,
      "targetGas": 15000000,
      "baseFeeChangeDenominator": 36,
      "minBlockGasCost": 0,
      "maxBlockGasCost": 1000000,
      "targetBlockRate": 2,
      "blockGasCostStep": 200000
    },
    "allowFeeRecipients": false
  },
  "alloc": {
    "8db97C7cEcE249c2b98bDC0226Cc4C2A57BF52FC": {
      "balance": "0x295BE96E64066972000000"
    }
  },
  "nonce": "0x0",
  "timestamp": "0x0",
  "extraData": "0x00",
  "gasLimit": "0x7A1200",
  "difficulty": "0x0",
  "mixHash": "0x0000000000000000000000000000000000000000000000000000000000000000",
  "coinbase": "0x0000000000000000000000000000000000000000",
  "number": "0x0",
  "gasUsed": "0x0",
  "parentHash": "0x0000000000000000000000000000000000000000000000000000000000000000"
}
Chain Config
chainID: Denotes the ChainID of to be created chain. Must be picked carefully since a conflict with
other chains can cause issues. One suggestion is to check with chainlist.org
to avoid ID collision, reserve and publish your ChainID properly.
You can use eth_getChainConfig RPC call to get the current chain config. See
here for more info.
Hard Forks
homesteadBlock, eip150Block, eip150Hash, eip155Block, byzantiumBlock, constantinopleBlock,
petersburgBlock, istanbulBlock, muirGlacierBlock, subnetEVMTimestamp are hard fork activation
times. Changing these may cause issues, so treat them carefully.
Fee Config
gasLimit: Sets the max amount of gas consumed per block.
targetBlockRate: Sets the target rate of block production in seconds. A target of 2 will target
producing a block every 2 seconds. If the network starts producing faster than this, base fees are
increased accordingly.
minBaseFee: Sets a lower bound on the EIP-1559 base fee of a block. Since the block's base fee sets
the minimum gas price for any transaction included in that block, this effectively sets a minimum gas
price for any transaction.
targetGas: Specifies the targeted amount of gas (including block gas cost) to consume within a
rolling 10-seconds window. When the dynamic fee algorithm observes that network activity is
above/below the targetGas, it increases/decreases the base fee proportionally to how far above/below
the target actual network activity is. If the network starts producing blocks with gas cost higher than
this, base fees are increased accordingly.
baseFeeChangeDenominator: Divides the difference between actual and target utilization to determine
how much to increase/decrease the base fee. A larger denominator indicates a slower changing, stickier
base fee, while a lower denominator allows the base fee to adjust more quickly.
minBlockGasCost: Sets the minimum amount of gas to charge for the production of a block.
maxBlockGasCost: Sets the maximum amount of gas to charge for the production of a block.
blockGasCostStep: Determines how much to increase/decrease the block gas cost depending on the
amount of time elapsed since the previous block.
If the block is produced at the target rate, the block gas cost will stay the same as the block gas cost for the parent block.
If it is produced faster/slower, the block gas cost will be increased/decreased by the step value for each second faster/slower than the target block rate accordingly.
If the blockGasCostStep is set to a very large number, it effectively requires block production to
go no faster than the targetBlockRate. For example, if a block is produced two seconds faster than
the target block rate, the block gas cost will increase by 2 * blockGasCostStep.
Custom Fee Recipients
See section Setting a Custom Fee Recipient
Alloc
See section Setting the Genesis Allocation
Header
The fields nonce, timestamp, extraData, gasLimit, difficulty, mixHash, coinbase,
number, gasUsed, parentHash defines the genesis block header. The field gasLimit should be
set to match the gasLimit set in the feeConfig. You do not need to change any of the other genesis
header fields.
Genesis Examples
Another example of a genesis file can be found in the
networks folder.
Note: please remove airdropHash and airdropAmount fields if you want to start with it.
Here are a few examples on how a genesis file is used:
Setting the Genesis Allocation
Alloc defines addresses and their initial balances. This should be changed accordingly for each chain. If you don't provide any genesis allocation, you won't be able to interact with your new chain (all transactions require a fee to be paid from the sender's balance).
The alloc field expects key-value pairs. Keys of each entry must be a valid address. The balance
field in the value can be either a hexadecimal or number to indicate initial balance of the address.
The default value contains 8db97C7cEcE249c2b98bDC0226Cc4C2A57BF52FC with 50000000000000000000000000
balance in it. Default:
  "alloc": {
    "8db97C7cEcE249c2b98bDC0226Cc4C2A57BF52FC": {
      "balance": "0x295BE96E64066972000000"
    }
  }
To specify a different genesis allocation, populate the alloc field in the genesis JSON as follows:
  "alloc": {
    "8db97C7cEcE249c2b98bDC0226Cc4C2A57BF52FC": {
      "balance": "0x52B7D2DCC80CD2E4000000"
    },
    "Ab5801a7D398351b8bE11C439e05C5B3259aeC9B": {
      "balance": "0xa796504b1cb5a7c0000"
    }
  },
The keys in the allocation are hex addresses
without the canonical 0x prefix. The balances are denominated in Wei
(10^18 Wei = 1 Whole Unit of Native Token) and expressed as hex strings
with the canonical 0x prefix. You can use this converter
to translate between decimal and hex numbers.
The above example yields the following genesis allocations (denominated in whole units of the native token, that is 1 METAL/1 WAGMI):
0x8db97C7cEcE249c2b98bDC0226Cc4C2A57BF52FC: 100000000 (0x52B7D2DCC80CD2E4000000=100000000000000000000000000 Wei)
0xAb5801a7D398351b8bE11C439e05C5B3259aeC9B: 49463 (0xa796504b1cb5a7c0000=49463000000000000000000 Wei)
Setting a Custom Fee Recipient
By default, all fees are burned (sent to the black hole address with "allowFeeRecipients": false).
However, it is possible to enable block producers to set a fee recipient (who will get compensated
for blocks they produce).
To enable this feature, you'll need to add the following to your
genesis file (under the "config" key):
{
  "config": {
    "allowFeeRecipients": true
  }
}
Fee Recipient Address
With allowFeeRecipients enabled, your validators can specify their addresses to collect fees. They
need to update their EVM chain config with the following to specify where
the fee should be sent to.
{
  "feeRecipient": "<YOUR 0x-ADDRESS>"
}
If allowFeeRecipients feature is enabled on the Subnet, but a validator doesn't specify a
"feeRecipient", the fees will be burned in blocks it produces.
Note: this mechanism can be also activated as a precompile. See Changing Fee Reward Mechanisms section for more details.
Precompiles
Subnet-EVM can provide custom functionalities with precompiled contracts. These precompiled
contracts can be activated through ChainConfig (in genesis or as an upgrade).
AllowList Interface
The AllowList interface is used by precompiles to check if a given address is allowed to use a
precompiled contract. AllowList consist of two main roles, Admin and Enabled. Admin can
add/remove other Admin and Enabled addresses. Enabled addresses can use the precompiled
contract, but cannot modify other roles.
AllowList adds adminAddresses and enabledAddresses fields to precompile contract configurations.
For instance fee manager precompile contract configuration looks like this:
{
  "feeManagerConfig": {
    "blockTimestamp": 0,
    "adminAddresses": [<list of addresses>],
    "enabledAddresses": [<list of addresses>]
  }
}
AllowList configuration affects only the related precompile. For instance, the admin address in
feeManagerConfig does not affect admin addresses in other activated precompiles.
The AllowList solidity interface is defined as follows, and can be found in IAlowList.sol:
//SPDX-License-Identifier: MIT
pragma solidity ^0.8.0;

interface IAllowList {
  // Set [addr] to have the admin role over the precompile
  function setAdmin(address addr) external;

  // Set [addr] to be enabled on the precompile contract.
  function setEnabled(address addr) external;

  // Set [addr] to have no role the precompile contract.
  function setNone(address addr) external;

  // Read the status of [addr].
  function readAllowList(address addr) external view returns (uint256 role);
}
readAllowList(addr) will return a uint256 with a value of 0, 1, or 2, corresponding to the roles
None, Enabled, and Admin respectively.
Note: AllowList is not an actual contract but just an interface. It's not callable by itself.
This is used by other precompiles. Check other precompile sections to see how this works.
Restricting Smart Contract Deployers
If you'd like to restrict who has the ability to deploy contracts on your
Subnet, you can provide an AllowList configuration in your genesis or upgrade file:
{
  "contractDeployerAllowListConfig": {
    "blockTimestamp": 0,
    "adminAddresses": ["0x8db97C7cEcE249c2b98bDC0226Cc4C2A57BF52FC"]
  }
}
In this example, 0x8db97C7cEcE249c2b98bDC0226Cc4C2A57BF52FC is named as the
Admin of the ContractDeployerAllowList. This enables it to add other Admin or to add
Enabled addresses. Both Admin and Enabled can deploy contracts. To provide
a great UX with factory contracts, the tx.Origin is checked for being a valid
deployer instead of the caller of CREATE. This means that factory contracts will still be
able to create new contracts as long as the sender of the original transaction is an allow
listed deployer.
The Stateful Precompile contract powering the ContractDeployerAllowList adheres to the
AllowList Solidity interface at 0x0200000000000000000000000000000000000000
(you can load this interface and interact directly in Remix):
If you attempt to add a
Enabledand you are not anAdmin, you will see something like: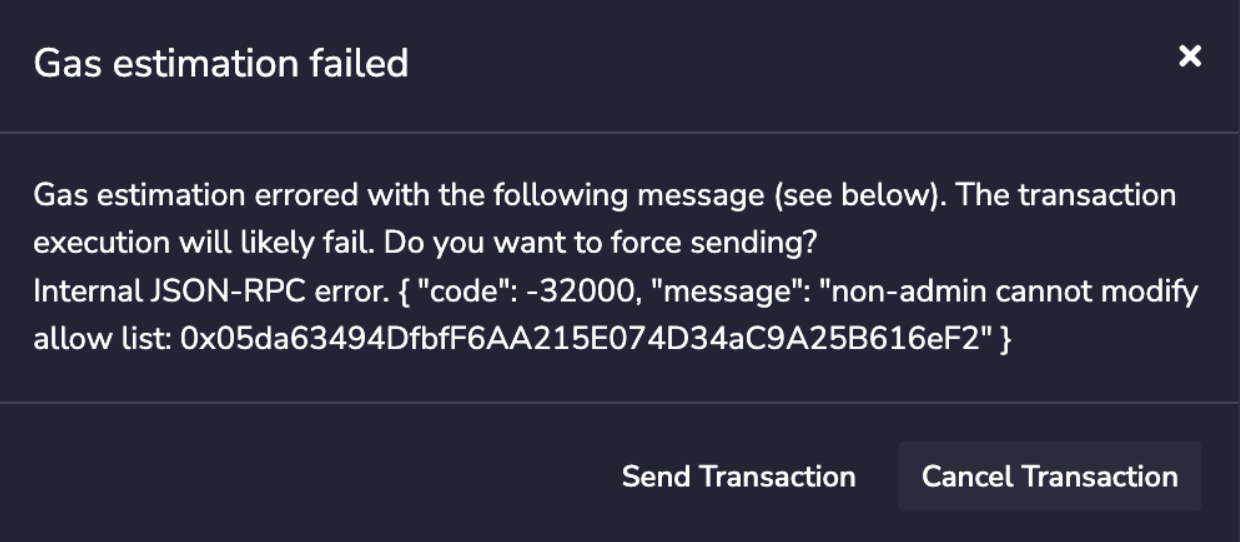
If you attempt to deploy a contract but you are not an
Adminnot aEnabled, you will see something like: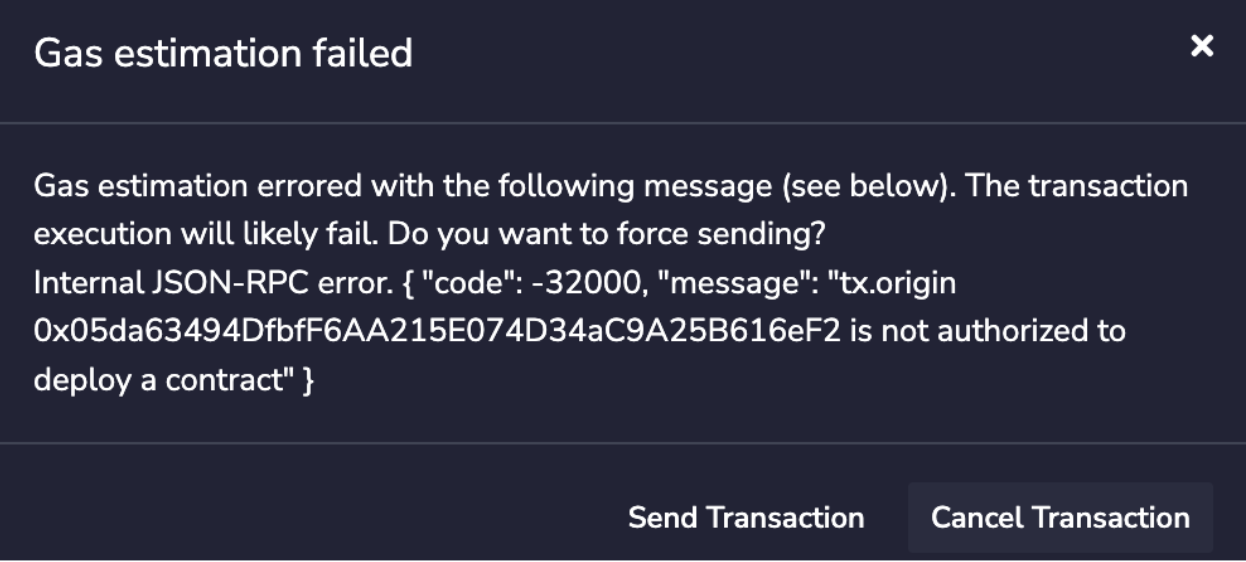
If you call
readAllowList(addr)then you can read the current role ofaddr, which will return a uint256 with a value of 0, 1, or 2, corresponding to the rolesNone,Enabled, andAdminrespectively.
If you remove all of the admins from the allow list, it will no longer be possible to update the allow list without modifying the Subnet-EVM to schedule a network upgrade.
Initial Contract Allow List Configuration
It's possible to enable this precompile with an initial configuration to activate its effect on
activation timestamp. This provides a way to enable the precompile without an admin address to manage
the deployer list. With this, you can define a list of addresses that are allowed to deploy contracts.
Since there will be no admin address to manage the deployer list, it can only be modified through a
network upgrade. To use initial configuration, you need to specify addresses in enabledAddresses
field in your genesis or upgrade file:
{
  "contractDeployerAllowListConfig": {
    "blockTimestamp": 0,
    "enabledAddresses": ["0x8db97C7cEcE249c2b98bDC0226Cc4C2A57BF52FC"]
  }
}
This will allow only 0x8db97C7cEcE249c2b98bDC0226Cc4C2A57BF52FC to deploy contracts. For further
information about precompile initial configurations see Initial Precompile Configurations.
Restricting Who Can Submit Transactions
Similar to restricting contract deployers, this precompile restricts which addresses may submit
transactions on chain. Like the previous section, you can activate the precompile by including an
AllowList configuration in your genesis file:
{
  "config": {
    "txAllowListConfig": {
      "blockTimestamp": 0,
      "adminAddresses": ["0x8db97C7cEcE249c2b98bDC0226Cc4C2A57BF52FC"]
    }
  }
}
In this example, 0x8db97C7cEcE249c2b98bDC0226Cc4C2A57BF52FC is named as the
Admin of the TransactionAllowList. This enables them to add other Admins or to add
Allowed. Both Admins and Enabled can submit transactions to the chain.
The Stateful Precompile contract powering the TxAllowList adheres to the
AllowList Solidity interface at 0x0200000000000000000000000000000000000002
(you can load this interface and interact directly in Remix):
If you attempt to add an
Enabledand you are not anAdmin, you will see something like:If you attempt to submit a transaction but you are not an
Adminor notEnabled, you will see something like:cannot issue transaction from non-allow listed addressIf you call
readAllowList(addr)then you can read the current role ofaddr, which will return auint256with a value of 0, 1, or 2, corresponding to the rolesNone,Allowed, andAdminrespectively.
If you remove all of the admins from the allow list, it will no longer be possible to update the allow list without modifying the Subnet-EVM to schedule a network upgrade.
Initial TX Allow List Configuration
It's possible to enable this precompile with an initial configuration to activate its effect on
activation timestamp. This provides a way to enable the precompile without an admin address to manage
the TX allow list. With this, you can define a list of addresses that are allowed to submit
transactions. Since there will be no admin address to manage the TX list, it can only be modified
through a network upgrade. To use initial configuration, you need to specify addresses in
enabledAddresses field in your genesis or upgrade file:
{
  "txAllowListConfig": {
    "blockTimestamp": 0,
    "enabledAddresses": ["0x8db97C7cEcE249c2b98bDC0226Cc4C2A57BF52FC"]
  }
}
This will allow only 0x8db97C7cEcE249c2b98bDC0226Cc4C2A57BF52FC to submit transactions. For further
information about precompile initial configurations see Initial Precompile Configurations.
Minting Native Coins
You can mint native(gas) coins with a precompiled contract. In order to activate this feature, you
can provide nativeMinterConfig in genesis:
{
  "config": {
    "contractNativeMinterConfig": {
      "blockTimestamp": 0,
      "adminAddresses": ["0x8db97C7cEcE249c2b98bDC0226Cc4C2A57BF52FC"]
    }
  }
}
adminAddresses denotes admin accounts who can add other Admin or Enabled accounts. Admin and
Enabled are both eligible to mint native coins for other addresses. ContractNativeMinter uses
same methods as in ContractDeployerAllowList.
The Stateful Precompile contract powering the ContractNativeMinter adheres to the following
Solidity interface at 0x0200000000000000000000000000000000000001 (you can load this interface and
interact directly in Remix):
// (c) 2022-2023, Ava Labs, Inc. All rights reserved.
// See the file LICENSE for licensing terms.

pragma solidity ^0.8.0;
import "./IAllowList.sol";

interface INativeMinter is IAllowList {
  // Mint [amount] number of native coins and send to [addr]
  function mintNativeCoin(address addr, uint256 amount) external;
}
mintNativeCoin takes an address and amount of native coins to be minted. The amount denotes the
amount in minimum denomination of native coins (10^18). For example, if you want to mint 1 native
coin (in METAL), you need to pass 1 * 10^18 as the amount.
Note that this uses IAllowList interface directly, meaning that it uses the same AllowList
interface functions like readAllowList and setAdmin, setEnabled, setNone. For more information
see AllowList Solidity interface.
EVM does not prevent overflows when storing the address balance. Overflows in balance opcodes are handled by setting the balance to maximum. However the same won't apply for API calls. If you try to mint more than the maximum balance, API calls will return the overflowed hex-balance. This can break external tooling. Make sure the total supply of native coins is always less than 2^256-1.
Initial Native Minter Configuration
It's possible to enable this precompile with an initial configuration to activate its effect on
activation timestamp. This provides a way to enable the precompile without an admin address to mint
native coins. With this, you can define a list of addresses that will receive an initial mint of the
native coin when this precompile activates. This can be useful for networks that require a one-time
mint without specifying any admin addresses. To use initial configuration, you need to specify a map
of addresses with their corresponding mint amounts in initialMint field in your genesis or upgrade
file:
{
  "contractNativeMinterConfig": {
    "blockTimestamp": 0,
    "initialMint": {
      "0x8db97C7cEcE249c2b98bDC0226Cc4C2A57BF52FC": "1000000000000000000",
      "0x10037Fb06Ec4aB8c870a92AE3f00cD58e5D484b3": "0xde0b6b3a7640000"
    }
  }
}
In the amount field you can specify either decimal or hex string. This will mint 1000000000000000000 (equivalent of 1 Native Coin denominated as 10^18) to both addresses. Note that these are both in string format. "0xde0b6b3a7640000" hex is equivalent to 1000000000000000000. For further information about precompile initial configurations see Initial Precompile Configurations.
Configuring Dynamic Fees
You can configure the parameters of the dynamic fee algorithm on chain using the FeeConfigManager.
In order to activate this feature, you will need to provide the FeeConfigManager in the genesis:
{
  "config": {
    "feeManagerConfig": {
      "blockTimestamp": 0,
      "adminAddresses": ["0x8db97C7cEcE249c2b98bDC0226Cc4C2A57BF52FC"]
    }
  }
}
The precompile implements the FeeManager interface which includes the same AllowList interface
used by ContractNativeMinter, TxAllowList, etc. For an example of the AllowList interface, see the
TxAllowList above.
The Stateful Precompile contract powering the FeeConfigManager adheres to the following Solidity
interface at 0x0200000000000000000000000000000000000003 (you can load this interface and interact
directly in Remix). It can be also found in
IFeeManager.sol:
//SPDX-License-Identifier: MIT
pragma solidity ^0.8.0;
import "./IAllowList.sol";

interface IFeeManager is IAllowList {
  // Set fee config fields to contract storage
  function setFeeConfig(
    uint256 gasLimit,
    uint256 targetBlockRate,
    uint256 minBaseFee,
    uint256 targetGas,
    uint256 baseFeeChangeDenominator,
    uint256 minBlockGasCost,
    uint256 maxBlockGasCost,
    uint256 blockGasCostStep
  ) external;

  // Get fee config from the contract storage
  function getFeeConfig()
    external
    view
    returns (
      uint256 gasLimit,
      uint256 targetBlockRate,
      uint256 minBaseFee,
      uint256 targetGas,
      uint256 baseFeeChangeDenominator,
      uint256 minBlockGasCost,
      uint256 maxBlockGasCost,
      uint256 blockGasCostStep
    );

  // Get the last block number changed the fee config from the contract storage
  function getFeeConfigLastChangedAt() external view returns (uint256 blockNumber);
}
FeeConfigManager precompile uses IAllowList interface directly, meaning that it uses the same
AllowList interface functions like readAllowList and setAdmin, setEnabled, setNone. For
more information see AllowList Solidity interface.
In addition to the AllowList interface, the FeeConfigManager adds the following capabilities:
getFeeConfig- retrieves the current dynamic fee configgetFeeConfigLastChangedAt- retrieves the timestamp of the last block where the fee config was updatedsetFeeConfig- sets the dynamic fee config on chain (see here for details on the fee config parameters)
You can also get the fee configuration at a block with the eth_feeConfig RPC method. For more
information see here.
Initial Fee Config Configuration
It's possible to enable this precompile with an initial configuration to activate its effect on
activation timestamp. This provides a way to define your fee structure to take effect at the
activation. To use the initial configuration, you need to specify the fee config in
initialFeeConfig field in your genesis or upgrade file:
{
  "feeManagerConfig": {
    "blockTimestamp": 0,
    "initialFeeConfig": {
      "gasLimit": 20000000,
      "targetBlockRate": 2,
      "minBaseFee": 1000000000,
      "targetGas": 100000000,
      "baseFeeChangeDenominator": 48,
      "minBlockGasCost": 0,
      "maxBlockGasCost": 10000000,
      "blockGasCostStep": 500000
    }
  }
}
This will set the fee config to the values specified in the initialFeeConfig field. For further
information about precompile initial configurations see Initial Precompile Configurations.
Changing Fee Reward Mechanisms
Fee reward mechanism can be configured with this stateful precompile contract called as
RewardManager. Configuration can include burning fees, sending fees to a predefined address, or
enabling fees to be collected by block producers. This precompile can be configured as follows in
the genesis file:
{
  "config": {
    "rewardManagerConfig": {
      "blockTimestamp": 0,
      "adminAddresses": ["0x8db97C7cEcE249c2b98bDC0226Cc4C2A57BF52FC"]
    }
  }
}
adminAddresses denotes admin accounts who can add other Admin or Enabled accounts. Admin and
Enabled are both eligible to change the current fee mechanism.
The precompile implements the RewardManager interface which includes the AllowList interface.
For an example of the AllowList interface, see the TxAllowList above.
The Stateful Precompile contract powering the RewardManager adheres to the following Solidity
interface at 0x0200000000000000000000000000000000000004 (you can load this interface and interact
directly in Remix). It can be also found in
IRewardManager.sol:
//SPDX-License-Identifier: MIT
pragma solidity ^0.8.0;
import "./IAllowList.sol";

interface IRewardManager is IAllowList {
  // setRewardAddress sets the reward address to the given address
  function setRewardAddress(address addr) external;

  // allowFeeRecipients allows block builders to claim fees
  function allowFeeRecipients() external;

  // disableRewards disables block rewards and starts burning fees
  function disableRewards() external;

  // currentRewardAddress returns the current reward address
  function currentRewardAddress() external view returns (address rewardAddress);

  // areFeeRecipientsAllowed returns true if fee recipients are allowed
  function areFeeRecipientsAllowed() external view returns (bool isAllowed);
}
RewardManager precompile uses IAllowList interface directly, meaning that it uses the same
AllowList interface functions like readAllowList and setAdmin, setEnabled, setNone. For
more information see AllowList Solidity interface.
In addition to the AllowList interface, the RewardManager adds the following capabilities:
setRewardAddress- sets the address to which fees are sent. This address can be a contract or a user address. The address becomes the required coinbase address for the blocks that this mechanism is enabled on. Meaning that it will receive the fees collected from the transactions in the block. Receiving fees will not call any contract functions or fallback functions. It will simply send the fees to the address.allowFeeRecipients- enables block producers to claim fees. This will allow block producers to claim fees by specifying their own addresses in their chain configs. See here for more information on how to specify the fee recipient address in the chain config.disableRewards- disables block rewards and starts burning fees.currentRewardAddress- returns the current reward address. This is the address to which fees are sent. It can include black hole address (0x010...0) which means that fees are burned. It can also include a predefined hash (0x0000000000000000000000000000000000000000) denoting custom fee recipients are allowed. It's advised to use theareFeeRecipientsAllowedfunction to check if custom fee recipients are allowed first.areFeeRecipientsAllowed- returns true if custom fee recipients are allowed.
These 3 mechanisms (burning, sending to a predefined address, and enabling fees to be collected by
block producers) cannot be enabled at the same time. Enabling one mechanism will take over the
previous mechanism. For example, if you enable allowFeeRecipients and then enable
disableRewards, the disableRewards will take over and fees will be burned.
Note: Reward addresses or fee recipient addresses are not required to be an admin or enabled account.
Initial Configuration
It's possible to enable this precompile with an initial configuration to activate its effect on
activation timestamp. This provides a way to enable the precompile without an admin address to
change the fee reward mechanism. This can be useful for networks that require a one-time reward
mechanism change without specifying any admin addresses. Without this initial configuration, the
precompile will inherit the feeRecipients mechanism activated at genesis. Meaning that if
allowFeeRecipients is set to true in the genesis file, the precompile will be enabled with the
allowFeeRecipients mechanism. Otherwise it will keep burning fees. To use the initial
configuration, you need to specify the initial reward mechanism in initialRewardConfig field in
your genesis or upgrade file.
In order to allow custom fee recipients, you need to specify the allowFeeRecipients field in the initialRewardConfig:
{
  "rewardManagerConfig": {
    "blockTimestamp": 0,
    "initialRewardConfig": {
      "allowFeeRecipients": true
    }
  }
}
In order to set an address to receive all transaction rewards, you need to specify the
rewardAddress field in the initialRewardConfig:
{
  "rewardManagerConfig": {
    "blockTimestamp": 0,
    "initialRewardConfig": {
      "rewardAddress": "0x8db97C7cEcE249c2b98bDC0226Cc4C2A57BF52FC"
    }
  }
}
In order to disable rewards and start burning fees, you need to leave all fields in the
initialRewardConfig empty:
{
  "rewardManagerConfig": {
    "blockTimestamp": 0,
    "initialRewardConfig": {}
  }
}
However this is different than the default behavior of the precompile. If you don't specify the
initialRewardConfig field, the precompile will inherit the feeRecipients mechanism activated at
genesis. Meaning that if allowFeeRecipients is set to true in the genesis file, the precompile
will be enabled with the allowFeeRecipients mechanism. Otherwise it will keep burning fees.
Example
configuration for this case:
{
  "rewardManagerConfig": {
    "blockTimestamp": 0,
    "adminAddresses": ["0x8db97C7cEcE249c2b98bDC0226Cc4C2A57BF52FC"]
  }
}
If allowFeeRecipients and rewardAddress are both specified in the initialRewardConfig field
then an error will be returned and precompile won't be activated. For further information about
precompile initial configurations see Initial Precompile
Configurations.
Contract Examples
Subnet-EVM contains example contracts for precompiles under /contract-examples. It's a hardhat
project with tests, tasks. For more information see contract examples README.
Network Upgrades: Enable/Disable Precompiles
Performing a network upgrade requires coordinating the upgrade network-wide. A network upgrade changes the rule set used to process and verify blocks, such that any node that upgrades incorrectly or fails to upgrade by the time that upgrade goes into effect may become out of sync with the rest of the network.
Any mistakes in configuring network upgrades or coordinating them on validators may cause the network to halt and recovering may be difficult.
In addition to specifying the configuration for each of the above precompiles in the genesis chain config, they can be individually enabled or disabled at a given timestamp as a network upgrade. Disabling a precompile disables calling the precompile and destructs its storage so it can be enabled at a later timestamp with a new configuration if desired.
These upgrades must be specified in a file named upgrade.json placed in the same directory where
config.json resides: {chain-config-dir}/{blockchainID}/upgrade.json.
For example, WAGMI Subnet upgrade should be placed in
~/.metalgo/configs/chains/2ebCneCbwthjQ1rYT41nhd7M76Hc6YmosMAQrTFhBq8qeqh6tt/upgrade.json.
The content of the upgrade.json should be formatted according to the following:
{
  "precompileUpgrades": [
    {
      "[PRECOMPILE_NAME]": {
        "blockTimestamp": "[ACTIVATION_TIMESTAMP]", // unix timestamp precompile should activate at
        "[PARAMETER]": "[VALUE]" // precompile specific configuration options, eg. "adminAddresses"
      }
    }
  ]
}
An invalid blockTimestamp in an upgrade file results the update failing.
The blockTimestamp value should be set to a valid Unix timestamp value which is
in the future relative to the head of the chain.
If the node encounters a blockTimestamp which is in the past, it will fail on startup.
To disable a precompile, the following format should be used:
{
  "precompileUpgrades": [
    {
      "<precompileName>": {
        "blockTimestamp": "[DEACTIVATION_TIMESTAMP]", // unix timestamp the precompile should deactivate at
        "disable": true
      }
    }
  ]
}
Each item in precompileUpgrades must specify exactly one precompile to enable or disable and the
block timestamps must be in increasing order. Once an upgrade has been activated (a block after the
specified timestamp has been accepted), it must always be present in upgrade.json exactly as it
was configured at the time of activation (otherwise the node will refuse to start).
Enabling and disabling a precompile is a network upgrade and should always be done with caution.
For safety, you should always treat precompileUpgrades as append-only.
As a last resort measure, it is possible to abort or reconfigure a precompile upgrade that has not been activated since the chain is still processing blocks using the prior rule set.
If aborting an upgrade becomes necessary, you can remove the precompile upgrade from upgrade.json
from the end of the list of upgrades. As long as the blockchain has not accepted a block with a
timestamp past that upgrade's timestamp, it will abort the upgrade for that node.
Example
{
  "precompileUpgrades": [
    {
      "feeManagerConfig": {
        "blockTimestamp": 1668950000,
        "adminAddresses": ["0x8db97C7cEcE249c2b98bDC0226Cc4C2A57BF52FC"]
      }
    },
    {
      "txAllowListConfig": {
        "blockTimestamp": 1668960000,
        "adminAddresses": ["0x8db97C7cEcE249c2b98bDC0226Cc4C2A57BF52FC"]
      }
    },
    {
      "feeManagerConfig": {
        "blockTimestamp": 1668970000,
        "disable": true
      }
    }
  ]
}
This example enables the feeManagerConfig at the first block with timestamp >= 1668950000, enables
txAllowListConfig at the first block with timestamp >= 1668960000, and disables feeManagerConfig
at the first block with timestamp >= 1668970000.
When a precompile disable takes effect (that is, after its blockTimestamp has passed), its storage
will be wiped. If you want to reenable it, you will need to treat it as a new configuration.
After you have created the upgrade.json and placed it in the chain config directory, you need to
restart the node for the upgrade file to be loaded (again, make sure you don't restart all Subnet
validators at once!). On node restart, it will print out the configuration of the chain, where you
can double-check that the upgrade has loaded correctly. In our example:
INFO [08-15|15:09:36.772] <2ebCneCbwthjQ1rYT41nhd7M76Hc6YmosMAQrTFhBq8qeqh6tt Chain>
github.com/ava-labs/subnet-evm/eth/backend.go:155: Initialised chain configuration
config=“{ChainID: 11111 Homestead: 0 EIP150: 0 EIP155: 0 EIP158: 0 Byzantium: 0
Constantinople: 0 Petersburg: 0 Istanbul: 0, Muir Glacier: 0, Subnet EVM: 0, FeeConfig:
{\“gasLimit\“:20000000,\“targetBlockRate\“:2,\“minBaseFee\“:1000000000,\“targetGas\
“:100000000,\“baseFeeChangeDenominator\“:48,\“minBlockGasCost\“:0,\“maxBlockGasCost\
“:10000000,\“blockGasCostStep\“:500000}, AllowFeeRecipients: false, NetworkUpgrades: {\
“subnetEVMTimestamp\“:0}, PrecompileUpgrade: {}, UpgradeConfig: {\"precompileUpgrades\":[{\"feeManagerConfig\":{\"adminAddresses\":[\"0x8db97c7cece249c2b98bdc0226cc4c2a57bf52fc\"],\"enabledAddresses\":null,\"blockTimestamp\":1668950000}},{\"txAllowListConfig\":{\"adminAddresses\":[\"0x8db97c7cece249c2b98bdc0226cc4c2a57bf52fc\"],\"enabledAddresses\":null,\"blockTimestamp\":1668960000}},{\"feeManagerConfig\":{\"adminAddresses\":null,\"enabledAddresses\":null,\"blockTimestamp\":1668970000,\"disable\":true}}]}, Engine: Dummy Consensus Engine}"”
Notice that precompileUpgrades entry correctly reflects the changes. You can also check the
activated precompiles at a timestamp with the
eth_getActivePrecompilesAt
RPC method. The eth_getChainConfig
RPC method will also return the configured upgrades in the response.
That's it, your Subnet is all set and the desired upgrades will be activated at the indicated timestamp!
Initial Precompile Configurations
Precompiles can be managed by some privileged addresses to change their configurations and activate
their effects. For example, the feeManagerConfig precompile can have adminAddresses which can
change the fee structure of the network.
{
  "precompileUpgrades": [
    {
      "feeManagerConfig": {
        "blockTimestamp": 1668950000,
        "adminAddresses": ["0x8db97C7cEcE249c2b98bDC0226Cc4C2A57BF52FC"]
      }
    }
  ]
}
In this example, only the address 0x8db97C7cEcE249c2b98bDC0226Cc4C2A57BF52FC is allowed to change
the fee structure of the network. The admin address has to call the precompile in order to activate
its effect; that is it needs to send a transaction with a new fee config to perform the update.
This is a very powerful feature, but it also gives a large amount of power to the admin address. If
the address 0x8db97C7cEcE249c2b98bDC0226Cc4C2A57BF52FC is compromised, the network is compromised.
With the initial configurations, precompiles can immediately activate their effect on the activation
timestamp. With this way admin addresses can be omitted from the precompile configuration. For example,
the feeManagerConfig precompile can have initialFeeConfig to setup the fee configuration on the
activation:
{
  "precompileUpgrades": [
    {
      "feeManagerConfig": {
        "blockTimestamp": 1668950000,
        "initialFeeConfig": {
          "gasLimit": 20000000,
          "targetBlockRate": 2,
          "minBaseFee": 1000000000,
          "targetGas": 100000000,
          "baseFeeChangeDenominator": 48,
          "minBlockGasCost": 0,
          "maxBlockGasCost": 10000000,
          "blockGasCostStep": 500000
        }
      }
    }
  ]
}
Notice that there is no adminAddresses field in the configuration. This means that there will be
no admin addresses to manage the fee structure with this precompile. The precompile will simply
update the fee configuration to the specified fee config when it activates on the blockTimestamp 1668950000.
It's still possible to add adminAddresses or enabledAddresses along with these initial
configurations. In this case, the precompile will be activated with the initial configuration, and
admin/enabled addresses can access to the precompiled contract normally.
If you want to change the precompile initial configuration, you will need to first disable it then activate the precompile again with the new configuration.
See every precompile initial configuration in their relevant Initial Configuration sections under Precompiles.
MetalGo Chain Configs
As described in this doc, each blockchain
of Subnets can have its own custom configuration. If a Subnet's ChainID is
2ebCneCbwthjQ1rYT41nhd7M76Hc6YmosMAQrTFhBq8qeqh6tt, the config file for this chain is located at
{chain-config-dir}/2ebCneCbwthjQ1rYT41nhd7M76Hc6YmosMAQrTFhBq8qeqh6tt/config.json.
For blockchains created by or forked from Subnet-EVM, most C-Chain configs are applicable except Metal Specific APIs.
Priority Regossip
A transaction is "regossiped" when the node does not find the transaction in
a block after priority-regossip-frequency (defaults to 1m). By default, up to 16 transactions
(max 1 per address) are regossiped to validators per minute.
Operators can use "priority regossip" to more aggressively "regossip" transactions for a set of important addresses (like bridge relayers). To do so, you'll need to update your chain config with the following:
{
  "priority-regossip-addresses": ["<YOUR 0x-ADDRESS>"]
}
By default, up to 32 transactions from priority addresses (max 16 per address) are regossiped to validators per second. You can override these defaults with the following config:
{
  "priority-regossip-frequency": "1s",
  "priority-regossip-max-txs": 32,
  "priority-regossip-addresses": ["<YOUR 0x-ADDRESS>"],
  "priority-regossip-txs-per-address": 16
}
Fee Recipient
This works together with allowFeeRecipients and RewardManager
precompile to specify where the fees should be sent to.
With allowFeeRecipients enabled, validators can specify their addresses to collect fees.
{
  "feeRecipient": "<YOUR 0x-ADDRESS>"
}
If allowFeeRecipients or RewardManager precompile is enabled on the Subnet, but a validator
doesn't specify a "feeRecipient", the fees will be burned in blocks it produces.